Okay, mama friends, let’s talk about something that’s pure comfort and joy: Pumpkin Magic Bars! These are the ultimate “I need a little something sweet” treat, and they’re surprisingly easy to throw together, even when you’re knee-deep in school projects and laundry piles. Trust me, if I can make these with a toddler “helping,” you can definitely conquer these easy pumpkin bars recipe!
My first experience with these pumpkin dessert bars was a little chaotic, to say the least. It was a blustery autumn day, and I was determined to make a Pinterest-worthy fall dessert. I found a recipe, gathered my ingredients, and then…disaster struck! The kids decided to have a full-blown glitter explosion in the living room (why?!), and I completely forgot about the bars in the oven!
They were a little…well, let’s just say they were extra crispy. But you know what? Even slightly burnt, the family devoured them! That’s when I knew I was onto something special with these 7 layer pumpkin bars. I tweaked the recipe, learned from my mistakes (set a timer!), and now they’re a fall staple.
These Pumpkin Magic Bars are all about layers of goodness, and they fit perfectly into my family’s busy life because they are quick, delicious and perfect for sharing! This recipe became a regular feature, especially when I’m craving a simple, seasonal treat that feels like a warm hug.
So, grab your mixing bowls, and let’s dive into this fall magic bars adventure together! I promise, even if you’re a little sleep-deprived and covered in sticky fingerprints (aren’t we all?), you can totally nail these.
INGREDIENTS You’ll Need:
Alright, let’s gather our supplies for these easy pumpkin bars recipe. Don’t worry, the list is short and sweet because mama doesn’t have time for complicated!
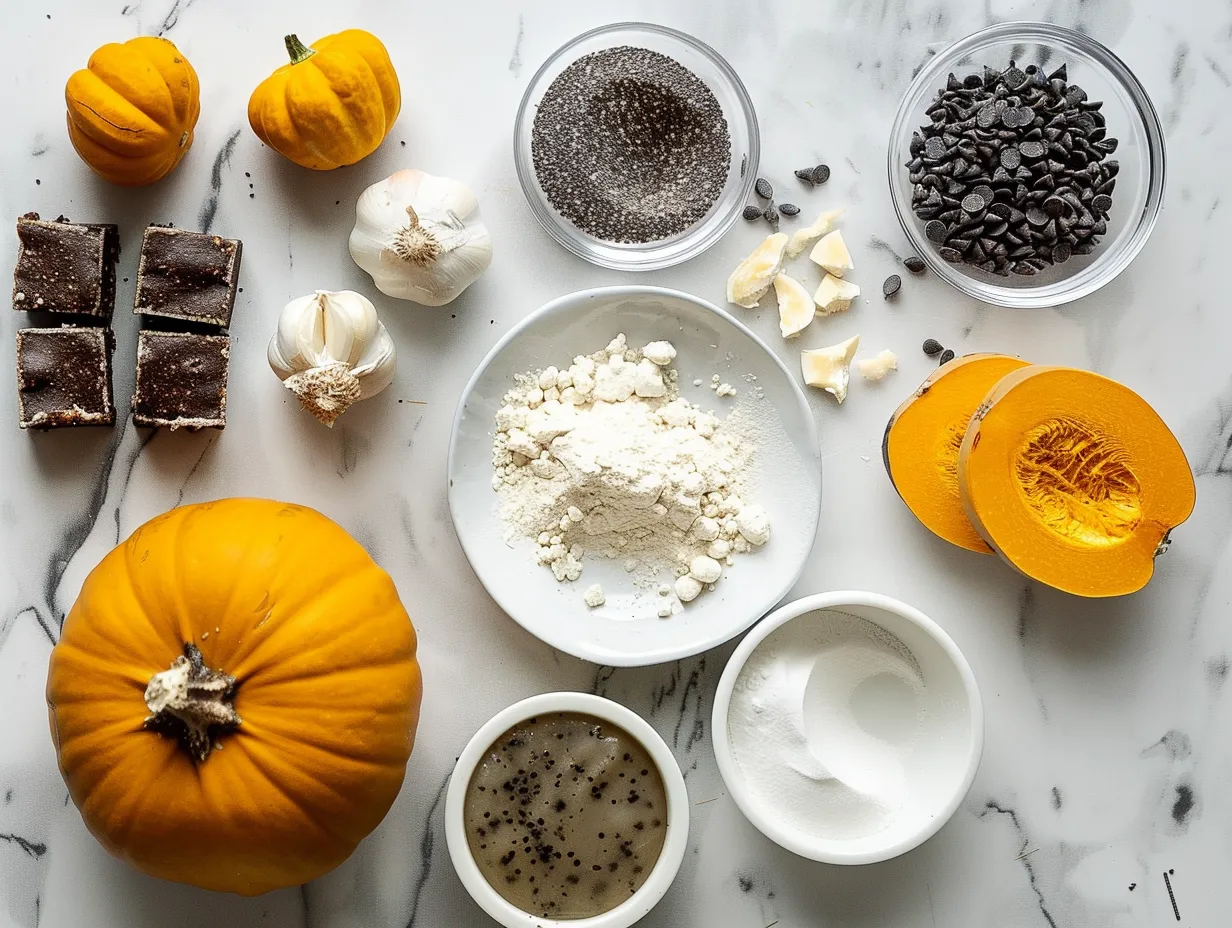
- 1 ½ cups graham cracker crumbs: This is the foundation of our Pumpkin Magic Bars, adding a nice, subtle sweetness and a little bit of texture. You can use store-bought crumbs or crush your own graham crackers.
- ½ cup (1 stick) melted butter: This helps bind the graham cracker crust together. I use unsalted butter, but salted works too – just cut back a bit on any added salt.
- 1 (14 ounce) can sweetened condensed milk: This is the “magic” ingredient that makes these bars so decadent and gooey! Don’t mistake this for evaporated milk; it has to be sweetened condensed milk for the correct sweetness and texture.
- 1 (15 ounce) can pumpkin puree: Not pumpkin pie filling, just plain pumpkin puree. It adds that classic pumpkin flavor and keeps the bars moist. You can often find this at Target or Walmart during your regular grocery run.
- 1 teaspoon pumpkin pie spice: This gives the bars that warm, cozy fall flavor. If you don’t have pumpkin pie spice, you can make your own by combining cinnamon, ginger, nutmeg, and cloves.
- 1 cup chocolate chips: I use semi-sweet chocolate chips, but milk chocolate or dark chocolate would also be delicious in these pumpkin dessert bars!
- 1 cup chopped pecans or walnuts: These add a nice crunch and nutty flavor. If you have nut allergies, you can easily omit them or substitute with sunflower seeds.
- 1 cup shredded coconut: This adds a subtle sweetness and chewy texture. If you’re not a fan of coconut, you can leave it out. My family loves when I add extra coconut!
No worries if you don’t have pecans – I use walnuts all the time in my Pumpkin Magic Bars, and they work great! And this Pumpkin Magic Bars doesn’t have to break the bank. I always check for store-brand ingredients, which are just as good and save you a few bucks.
I always double the batch of these 7 layer pumpkin bars because they disappear so fast! They store well in an airtight container at room temperature for up to 3 days or in the fridge for up to a week.
Let’s Make it Happen!
Okay, my friends, let’s get cooking! Here’s how we bring these Pumpkin Magic Bars to life, step-by-step. Don’t worry, I’ll be right here with you.
- Preheat the oven to 350°F (175°C). Grease a 9×13 inch baking pan. I usually use baking spray to make sure the bars don’t stick.
- In a medium bowl, combine the graham cracker crumbs and melted butter. Mix well until the crumbs are evenly moistened. Press the mixture into the bottom of the prepared baking pan to form a crust. This is the foundation of our delicious Pumpkin Magic Bars!
- Pour the sweetened condensed milk evenly over the graham cracker crust. Make sure it covers the entire surface. This is what makes these 7 layer pumpkin bars so rich and decadent.
- In a separate bowl, whisk together the pumpkin puree and pumpkin pie spice. Spread this mixture evenly over the sweetened condensed milk layer. It might seem like a lot, but trust me, it’ll bake up beautifully.
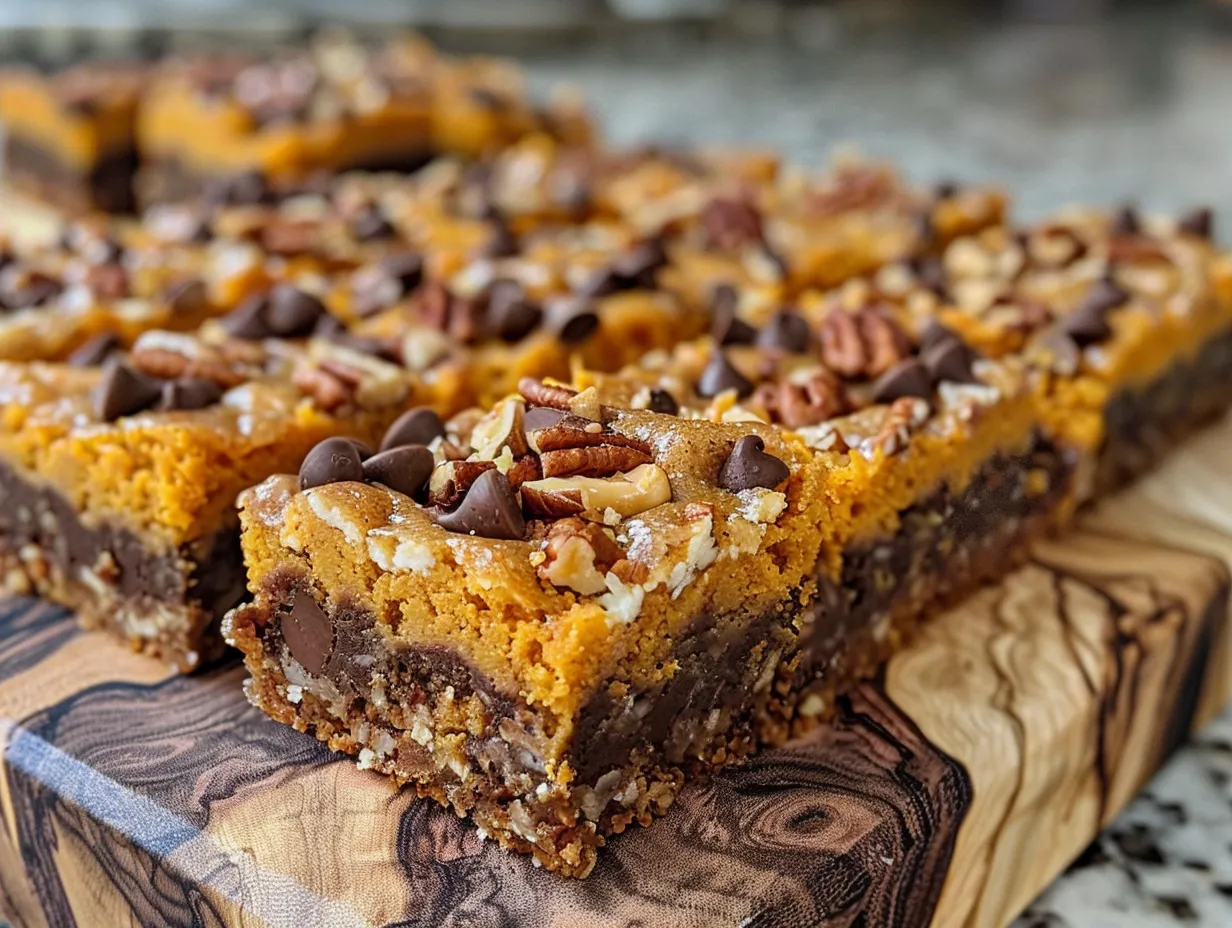
- Sprinkle the chocolate chips, nuts, and coconut evenly over the pumpkin layer. Don’t be shy – the more toppings, the merrier! I love the combination of chocolate, nuts, and coconut in these pumpkin dessert bars.
- Gently press the toppings into the pumpkin layer. This helps them adhere to the bars while baking.
- Bake for 25-30 minutes, or until the bars are golden brown and the edges are set. The center might still be a little soft, but it will firm up as it cools. In my chaotic kitchen, this Pumpkin Magic Bars usually takes about 28 minutes, but ovens vary, so keep an eye on them!
- Let the bars cool completely in the pan before cutting into squares. This is important – if you try to cut them while they’re still warm, they’ll be a gooey mess. Perfect time to fold that laundry pile!
- Cut into squares and enjoy! These bars are best served at room temperature, but they’re also delicious cold from the fridge.
Here’s where I used to mess up my Pumpkin Magic Bars – I wouldn’t let them cool completely! Don’t make my mistake! I know, waiting is hard, especially when the aroma of pumpkin and chocolate is wafting through the air. While your Pumpkin Magic Bars are doing its thing, pour yourself that well-deserved coffee!
Don’t panic if your Pumpkin Magic Bars looks a little uneven – that’s part of their charm! These are meant to be rustic and homemade, not perfectly polished. Remember, we’re going for delicious, not perfect.
How We Love to Eat This!
Okay, so you’ve baked these beautiful Pumpkin Magic Bars, now what? Let’s talk about how my family loves to devour them (and maybe get some inspiration for your own crew).
The kids devour this Pumpkin Magic Bars when I serve it with a scoop of vanilla ice cream. The warm bars and cold ice cream are a match made in heaven! It’s also fun to crumble them over yogurt or add them to a lunchbox as a special treat.
These Pumpkin Magic Bars are perfect for those crazy weeknight dinners when you need a little something sweet to make everyone happy. They’re also great for potlucks, bake sales, and holiday gatherings. I even made them for a friend’s baby shower once, and they were a huge hit!
I like to get a little fancy and drizzle melted white chocolate over the top for presentation. A sprinkle of sea salt also adds a nice contrast to the sweetness. Honestly, though, they’re delicious straight from the pan, no presentation required!
We always have leftovers (mostly because I hide a few for myself!), but they never last long. I like to crumble them over oatmeal for a special breakfast or chop them up and mix them into ice cream. You can also freeze them for later – just wrap them individually in plastic wrap and store them in a freezer bag.
I tried a seasonal variation last year with crushed gingersnap cookies instead of graham crackers, and it was amazing! It added a nice spicy kick to the bars. I’ve also experimented with different nuts – walnuts, almonds, and even pistachios all work well.
My neighbor, Sarah, always raves about these Pumpkin Magic Bars. She says they’re the perfect combination of sweet, salty, and crunchy. Her kids are also obsessed, which is always a good sign!
And remember, this Pumpkin Magic Bars reminds me of another family favorite, Pumpkin French Toast Roll-Ups, so be sure to check that recipe out!
FAQs: Your Questions Answered
Alright, let’s tackle some of those burning questions you might have about these fall magic bars. I’ve been there, I get it!
Can my picky eater handle this Pumpkin Magic Bars?
Yes, possibly! The pumpkin flavor is pretty mild, especially with all the chocolate and other goodies. If your picky eater is hesitant, try letting them help with the topping – they might be more likely to try something they helped make! My youngest is a picky eater, but he loves these easy pumpkin bars recipe!
What if I burn my Pumpkin Magic Bars? (Asking for a friend… okay, it was me!)
We’ve all been there! If the edges are getting too brown but the center is still soft, cover the pan with foil for the remaining baking time. This will prevent the edges from burning while the center finishes cooking.
Can I make this Pumpkin Magic Bars ahead for meal prep?
Absolutely! These are great for meal prepping because they keep well. You can bake them a day or two in advance and store them in an airtight container at room temperature or in the fridge.
Can I use a different kind of crust?
Sure! If you’re not a fan of graham crackers, you can use crushed Oreos, shortbread cookies, or even pretzels for a salty-sweet twist.
Can I substitute the sweetened condensed milk?
Unfortunately, no. Sweetened condensed milk is essential for the texture and sweetness of these bars. There’s really no good substitute.
Can I add other toppings?
Go for it! Feel free to customize these Pumpkin Magic Bars with your favorite toppings. Marshmallows, butterscotch chips, or even dried cranberries would be delicious.
Are these Pumpkin Magic Bars gluten-free?
Not as written, but you can easily make them gluten-free by using gluten-free graham crackers or a gluten-free cookie crust.
And if your kids love these easy pumpkin bars recipe, they’ll go crazy for these delicious Pumpkin Chai Cinnamon Rolls!
Final Thoughts:
These Pumpkin Magic Bars are more than just a dessert; they’re a little slice of fall happiness. They’re easy to make, customizable, and always a crowd-pleaser. Plus, they fill your kitchen with the most amazing aroma!
These are special to my family because they’re a reminder of cozy autumn days, family gatherings, and the simple joy of sharing a sweet treat together. My oldest loves them with extra chocolate chips, while my youngest prefers them with no nuts (go figure!).
Here are a few Mommy Made Meals Mom Hacks for making these bars even easier:
- Pre-crush the graham crackers: Save time by crushing the graham crackers in a food processor or using a rolling pin to crush them in a zip-top bag.
- Melt the butter in the microwave: Melt the butter in the microwave for a few seconds to save time and dishes.
- Use a measuring cup to spread the sweetened condensed milk: Pour the sweetened condensed milk into a measuring cup and then pour it evenly over the crust for easy spreading.
Here are some family-tested variations:
- Gingerbread Magic Bars: Use gingerbread cookies for the crust and add a teaspoon of ground ginger to the pumpkin mixture.
- Apple Pie Magic Bars: Use crushed shortbread cookies for the crust and add a layer of apple pie filling before adding the pumpkin mixture. For a different twist, check out Pumpkin Pie Dream Bars – A Latte Food.
- Caramel Pecan Magic Bars: Add a layer of caramel sauce and extra pecans to the topping. You might even say it adds some extra Pumpkin Seven Layer Magic!
No matter how you make them, I hope these Pumpkin Magic Bars bring a little bit of magic to your kitchen and your family. Remember, cooking is all about experimenting and having fun, so don’t be afraid to get creative! Explore other variations, like these Pumpkin Magic Cookie Bars – The Salted Cookie!
And for more sanity-saving dinner ideas, check out my Homemade Spiced Pumpkin Butter.
So, go ahead, kitchen warriors! Embrace the beautiful chaos and whip up a batch of these Pumpkin Magic Bars. You got this!
Pumpkin Magic Bars
These Pumpkin Magic Bars are a delightful fall treat! A buttery graham cracker crust is topped with layers of chocolate chips, coconut, pecans, and a rich pumpkin custard for a perfectly sweet and spiced dessert.
- Prep Time: 15 minutes
- Cook Time: 30 minutes
- Total Time: 45 minutes
- Yield: 24 servings
- Category: Dessert
- Method: Baked
- Cuisine: American
Ingredients
- 1 1/2 cups graham cracker crumbs
- 1/2 cup (1 stick) unsalted butter, melted
- 1 (14 ounce) can sweetened condensed milk
- 1 (15 ounce) can pumpkin puree
- 2 large eggs
- 1 teaspoon pumpkin pie spice
- 1/2 teaspoon vanilla extract
- 1 cup semi-sweet chocolate chips
- 1 cup shredded coconut
- 1 cup chopped pecans
Instructions
- Preheat oven to 350°F (175°C). Grease and flour a 9×13 inch baking pan.
- In a medium bowl, combine graham cracker crumbs and melted butter. Press evenly into the bottom of the prepared pan.
- In a large bowl, whisk together sweetened condensed milk, pumpkin puree, eggs, pumpkin pie spice, and vanilla extract until smooth.
- Pour the pumpkin mixture evenly over the graham cracker crust.
- Sprinkle chocolate chips, coconut, and pecans evenly over the pumpkin mixture.
- Bake for 25-30 minutes, or until the filling is set and the edges are lightly golden brown.
- Let cool completely in the pan before cutting into bars.
Notes
For extra flavor, toast the pecans before adding them to the bars. Serve with a dollop of whipped cream or a scoop of vanilla ice cream.