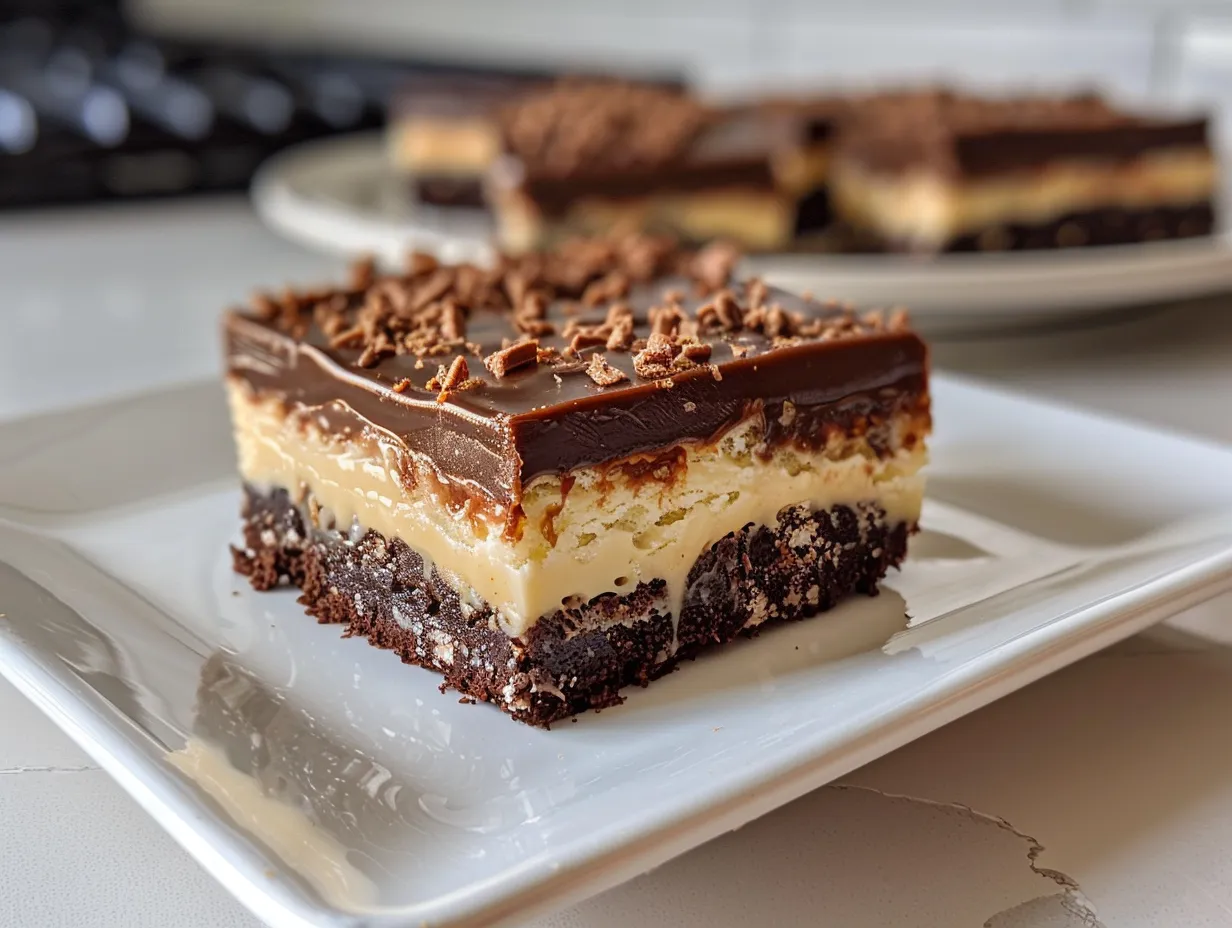
Okay, Mom Tribe, let’s talk about a dessert that’s pure Canadian comfort food: Nanaimo Bars! These layered chocolate dessert bars are a no-bake dream, perfect for when you need a sweet treat without turning on the oven.
I remember the first time I attempted Nanaimo Bars. It was a sweltering summer day, the kids were bouncing off the walls, and I was determined to make something impressive for a potluck. Let’s just say the custard layer was a bit…runny. I was so embarrassed! My Nanaimo Bars looked nothing like the picture, but everyone devoured them anyway. That’s when I realized homemade doesn’t have to be perfect to be loved.
Nanaimo Bars fit so well into my family life because they’re quick, easy, and everyone loves them! I can whip up a batch while the kids are doing homework, and suddenly, I’m Mom of the Year. Ready to join me in the kitchen? Let’s tackle these chocolate dessert bars together, fellow kitchen warriors!
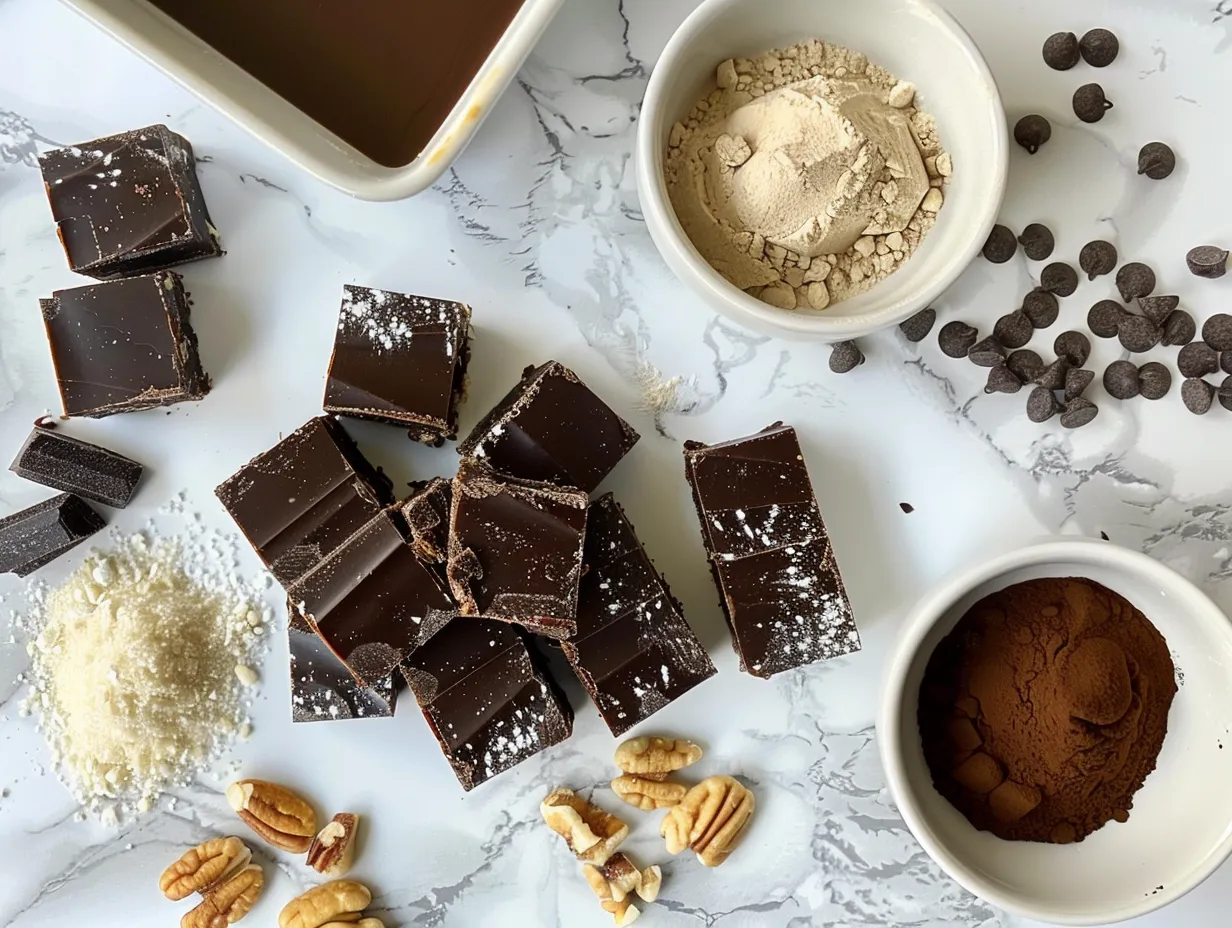
INGREDIENTS You’ll Need
Alright, here’s what you need for your Nanaimo Bar recipe. Don’t worry, this list is short and sweet because mama doesn’t have time for fancy!
- For the Base:
- ½ cup (1 stick) unsalted butter
- ¼ cup granulated sugar
- 5 tablespoons unsweetened cocoa powder
- 1 large egg, beaten
- 1 ¾ cups graham cracker crumbs
- ½ cup finely chopped walnuts or almonds (optional, but adds a nice crunch!)
- ⅓ cup shredded coconut
- For the Custard Filling:
- ½ cup (1 stick) unsalted butter, softened
- ¼ cup custard powder (like Bird’s)
- 2 tablespoons milk
- 2 cups powdered sugar
- For the Chocolate Ganache Topping:
- 4 ounces semi-sweet chocolate, chopped
- 2 tablespoons unsalted butter
No worries if you don’t have walnuts! I often use pecans or even just skip the nuts altogether in my Nanaimo Bars. You can grab custard powder at most grocery stores, or even online. This Nanaimo Bars recipe doesn’t have to break the bank. Feel free to use store-brand ingredients – nobody will know the difference!
Here’s a mom hack that saved my sanity: Measure out all your ingredients BEFORE you start. Trust me, it makes the whole process smoother, especially with little helpers around. You can store leftover Nanaimo Bars in the fridge for up to a week (if they last that long!).
My family loves when I add a pinch of sea salt to the chocolate topping. It really brings out the flavor and elevates these Nanaimo Bars.
Let’s Make it Happen!
Okay, kitchen warriors, let’s get our hands dirty and make these amazing Nanaimo Bars!
- Melt the base ingredients: In a saucepan, melt the butter, sugar, and cocoa powder over medium heat. Stir until smooth. Remove from heat and stir in the beaten egg.
- Add the dry ingredients: Stir in the graham cracker crumbs, nuts (if using), and coconut. Press this mixture firmly into the bottom of an ungreased 9×13 inch pan. Pro tip: use the bottom of a measuring cup to really pack it down.
- Make the custard filling: In a mixing bowl, cream together the softened butter, custard powder, and milk. Gradually add the powdered sugar until smooth and creamy. Don’t panic if your custard looks a little thick; it will spread easily.
- Spread the custard: Spread the custard filling evenly over the cooled base.
- Chill time! Place the pan in the refrigerator to chill for at least 30 minutes. This is the perfect time to fold that laundry pile or unload the dishwasher. In my chaotic kitchen, this Nanaimo Bars chilling usually takes closer to an hour with all the interruptions!
- Make the chocolate topping: In a heatproof bowl set over a saucepan of simmering water (or in the microwave in 30-second intervals), melt the chocolate and butter together. Stir until smooth.
- Pour and chill again: Pour the melted chocolate evenly over the custard layer. Return the pan to the refrigerator and chill for at least 2 hours, or until the chocolate is firm. Your Nanaimo Bars should smell amazing by now!
- Cut and serve: Once the chocolate is set, cut the Nanaimo Bars into squares. I like to use a warm knife for clean cuts. And voila! You’ve got yourself a batch of delicious Nanaimo Bars.
Here’s where I used to mess up my Nanaimo Bars: I wouldn’t chill them long enough, and the chocolate would crack when I cut them. Don’t make my mistake! Patience is key. While your Nanaimo Bars are doing its thing in the fridge, pour yourself that well-deserved coffee or tea! For another no-bake favorite, try my salted caramel chocolate chip cookie bars.
How We Love to Eat This!
My family devours this Nanaimo Bars any time I make it! These chocolate dessert bars are perfect for those crazy weeknight dinners when you need a little something sweet to end the meal.
The kids especially love when I serve this with a scoop of vanilla ice cream or a side of fresh berries. I’ve even been known to crumble a Nanaimo Bar over a bowl of ice cream for an extra-special treat. These are perfect for potlucks, bake sales, or any occasion where you need to bring a crowd-pleasing dessert.
For a fun twist, try cutting the Nanaimo Bars into smaller squares or even triangles. You can also drizzle them with melted white chocolate for a pretty presentation. I always make sure to have some on hand when friends come over. They are so easy to grab out of the fridge for a treat.
Leftovers (if there are any!) can be stored in an airtight container in the refrigerator for up to a week. Honestly, though, they never last that long in my house! During the holidays, I like to add a sprinkle of festive sprinkles to the chocolate topping. It adds a fun and colorful touch! If your kids love this, they’ll go crazy for my frosted zucchini spice bars.
FAQs: Your Questions Answered
Alright, let’s tackle some of those burning questions you might have about making Nanaimo Bars.
Can my picky eater handle this Nanaimo Bars?
It depends on what your picky eater is picky about! The chocolate and custard layers are usually a hit, but some kids might not like the nuts or coconut in the base. You can easily leave those out or substitute them with something else they enjoy, like chopped pretzels.
What if I burn my Nanaimo Bars base? (Asking for a friend… okay, it was me!)
Oh, honey, we’ve all been there! If the base gets a little too toasty, don’t panic. Scrape off the burnt parts and proceed with the recipe. The custard and chocolate layers will help to hide any imperfections. And hey, a little bit of burnt flavor never hurt anyone (maybe?).
Can I make this Nanaimo Bars ahead for meal prep?
Absolutely! Nanaimo Bars are perfect for making ahead. In fact, they taste even better after they’ve had a chance to chill in the fridge for a day or two. Just make sure to store them in an airtight container to prevent them from drying out.
What can I use instead of custard powder?
If you can’t find custard powder, you can substitute it with cornstarch. Use 2 tablespoons of cornstarch mixed with 2 tablespoons of milk. It won’t have the exact same flavor, but it will still work!
My custard layer is too runny. What did I do wrong?
This usually happens if the butter is too warm or if you didn’t add enough powdered sugar. Make sure your butter is softened, not melted, and gradually add the powdered sugar until the custard reaches a thick, creamy consistency. If it’s still runny, pop it in the fridge for a few minutes to firm up.
Can I freeze Nanaimo Bars?
Yes, you can! Wrap the Nanaimo Bars tightly in plastic wrap and then place them in a freezer-safe bag or container. They can be frozen for up to 2-3 months. Thaw them in the refrigerator before serving.
What’s the best way to cut Nanaimo Bars without the chocolate cracking?
The key is to use a warm knife. Run the knife under hot water, dry it off, and then cut the Nanaimo Bars. Repeat this process as needed. You can also try using a pizza cutter for clean, even cuts. For more sanity-saving dinner ideas, check out Mommy Made Meals!
Final Thoughts
Nanaimo Bars are special to my family because they’re a reminder that even the simplest things can bring joy. Plus, they’re a no-bake wonder, which is a lifesaver during the hot summer months!
Here are my Nanaimo Bars Mom Hacks:
- Use parchment paper to line the pan: This makes it super easy to lift the Nanaimo Bars out of the pan for cutting.
- Add a pinch of sea salt to the chocolate topping: It enhances the flavor and adds a nice contrast to the sweetness.
- Don’t be afraid to experiment: Try different extracts or flavorings in the custard filling.
Family-Tested Variations:
- Peanut Butter Nanaimo Bars: Add a layer of peanut butter between the base and the custard.
- Mint Chocolate Nanaimo Bars: Add a few drops of peppermint extract to the chocolate topping.
- Coffee Nanaimo Bars: Add a tablespoon of instant coffee to the custard filling.
My oldest prefers the classic Nanaimo Bars, while my youngest loves the peanut butter version. For even more tips and variations, check out this Nanaimo Bars Recipe – Desserts!
I hope you and your family enjoy this classic Canadian dessert as much as we do. Don’t be afraid to make it your own and experiment with different flavors and variations. And remember, even if your Nanaimo Bars aren’t perfect, they’ll still be delicious! I found this How to Make Nanaimo Bars (a Delicious Chocolate No-Bake Dessert) which gives a great background on Nanaimo Bars! For even more background on Nanaimo Bars, check out this Nanaimo Bars – A Canadian Tradition – Earth, Food, and Fire
Go forth and conquer, fellow kitchen warriors! You’ve got this!
Nanaimo Bars
Nanaimo Bars are a classic Canadian dessert with a rich chocolate ganache, creamy custard filling, and a sweet coconut and graham cracker base. These no-bake bars are perfect for any occasion and are sure to impress!
- Prep Time: 20 minutes
- Cook Time: 5 minutes
- Total Time: 2 hours 25 minutes
- Yield: 16 servings
- Category: Dessert
- Method: No-Cook
- Cuisine: Canadian
Ingredients
Scale
- Base:
- 1/2 cup unsalted butter, softened
- 1/4 cup granulated sugar
- 5 tbsp unsweetened cocoa powder
- 1 large egg, beaten
- 1 3/4 cups graham cracker crumbs
- 1/2 cup shredded coconut
- 1/4 cup chopped walnuts or almonds (optional)
- Custard Filling:
- 1/2 cup unsalted butter, softened
- 3 tbsp milk
- 2 tbsp vanilla custard powder
- 2 cups powdered sugar
- Chocolate Ganache:
- 4 oz semi-sweet chocolate, chopped
- 2 tbsp unsalted butter
Instructions
- Prepare the Base: In a saucepan, melt the butter, sugar, and cocoa powder over medium heat. Remove from heat and stir in the beaten egg.
- Add the graham cracker crumbs, coconut, and nuts (if using). Mix well until combined.
- Press the mixture firmly into the bottom of an ungreased 8×8 inch baking pan. Chill in the refrigerator for 30 minutes.
- Prepare the Custard Filling: In a mixing bowl, cream together the butter, milk, and custard powder until smooth. Gradually add the powdered sugar, beating until light and fluffy.
- Spread the custard filling evenly over the chilled base. Chill in the refrigerator for another 30 minutes.
- Prepare the Chocolate Ganache: In a heatproof bowl set over a saucepan of simmering water (or in the microwave in 30-second intervals), melt the chocolate and butter until smooth.
- Pour the chocolate ganache over the custard filling, spreading evenly.
- Chill in the refrigerator for at least 1 hour before cutting into squares.
Notes
For easier cutting, run a warm knife under hot water and dry it before each slice. Store leftover Nanaimo Bars in the refrigerator.